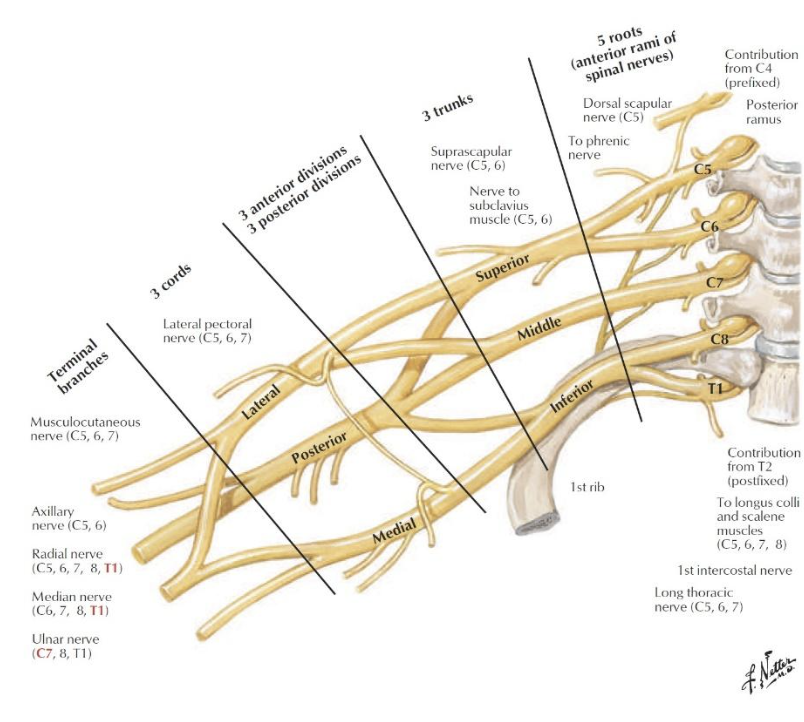
These three words are enough to strike fear into the heart of even the most intrepid anatomy, pre-clinical, or clinical student. There’s so many nerves, some in front and some behind, some looping around – it’s easy to get tripped up trying to make sense of this complex structure.
But don’t worry – you can navigate your way through this cat’s cradle of the nervous system by making a simple line drawing. Once you get the hang of it, you’ll never sweat the brachial plexus again.
Start Drawing!
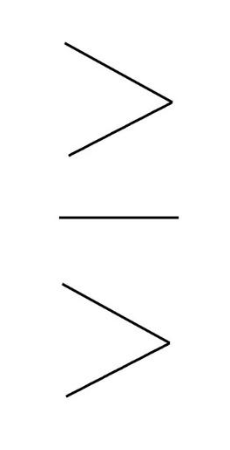
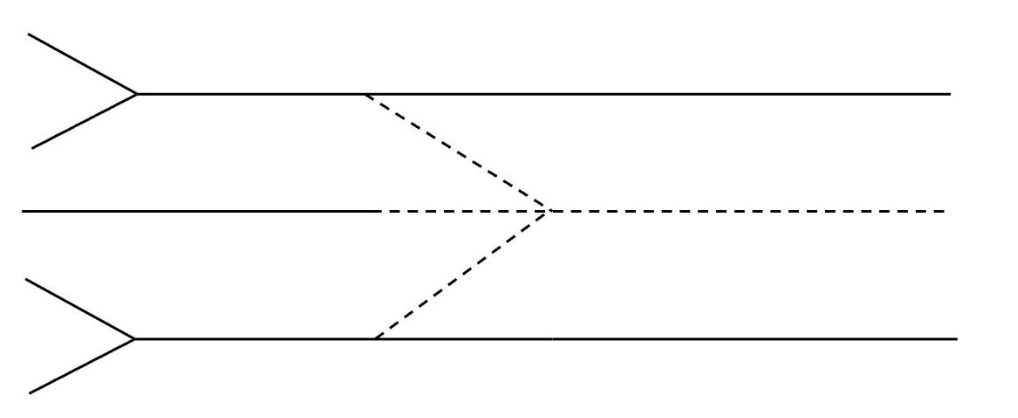
First, draw two V shapes on their sides, with a line in between.
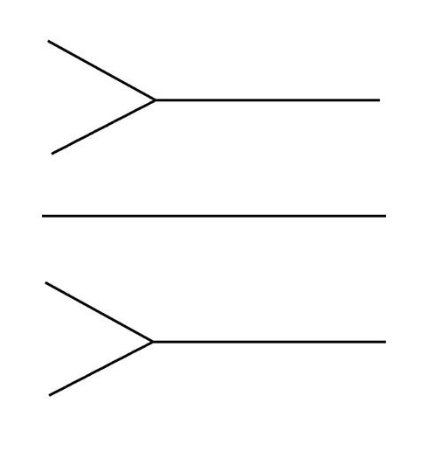
Next, draw a straight line extending from the point of each V shape, and extend the line in between so it’s longer. Easy!
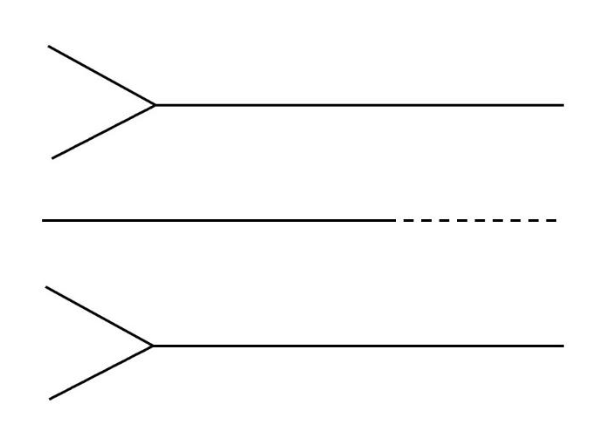
Extend the lines on the top and bottom. Then, extend the line in the middle, but make this line dashed instead of solid.
Make a big V on its side using dashed lines, starting from the top and bottom lines and extending until the meet at the middle dashed line. It should look like you’ve drawn an arrow pointing forward with dashed lines.

Extend the solid lines on the top and bottom. Then, draw a dashed line from the tip of the dashed forward arrow you made from the last step.
And Now, For Something Different
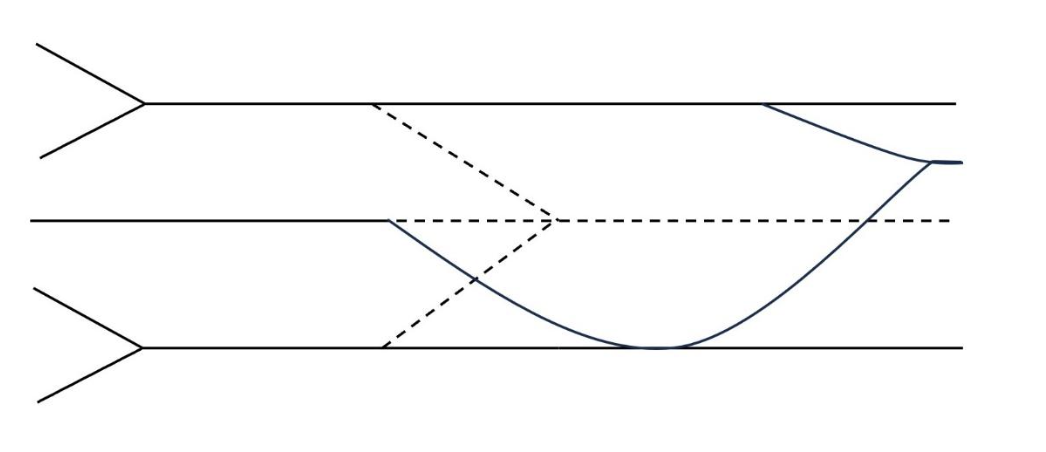
Now – and stay with me here – you’re going to start drawing an eye. Yep, you read that correctly – an eye. If you’ve ever drawn an eye, you may remember drawing an almond shape, and then drawing circles for the iris and pupils inside of it. You’re going to begin drawing that almond shape, making part of the top of the eye, and then drawing the entire bottom of the eye. Here’s what it should look like below:
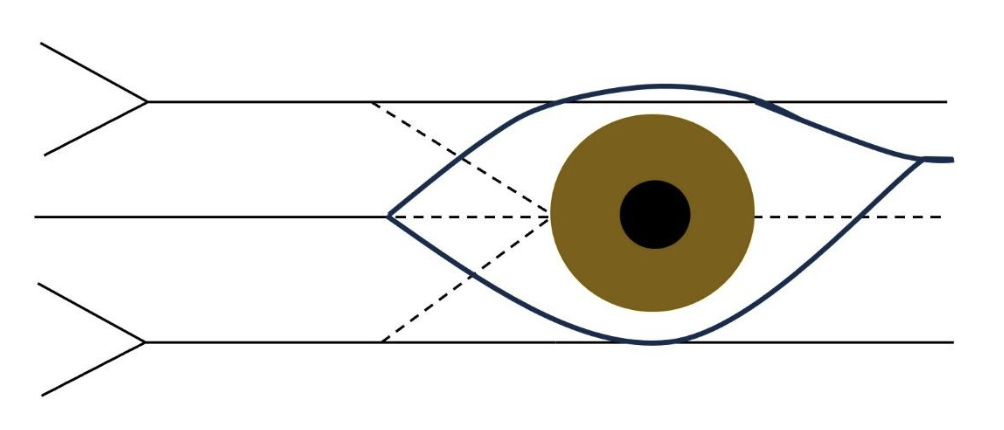
If you kept on going to complete the eye, it would look like this! We’re not going to, since we’re making the brachial plexus, but this helps you visualize the eye you’ve partly drawn.
An Alternative Method for this Step
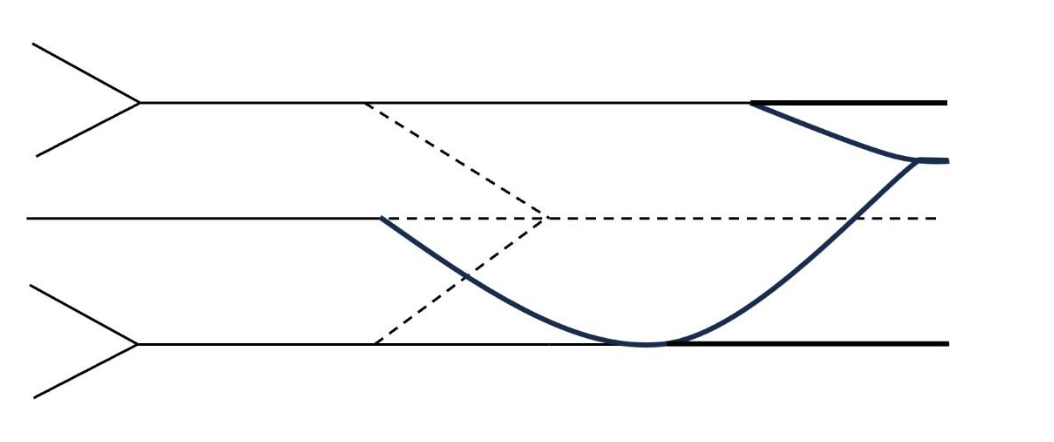
Another way you can think about this, if you don’t like the eye, is to draw an asymmetrical M. Then, create a loop from the bottom of the M up to the middle of the line, where the dashes begin.
Finish It Up!
We’re almost done! Draw a curved, dashed line extending down from the long dashed line in the middle.

And that’s it!
Putting It All Together
You did it! Now let’s see how this drawing you made corresponds to the brachial plexus. Your drawing can be broken up into the five main parts of the brachial plexus – Roots, Trunks, Divisions, Cords, and Branches.
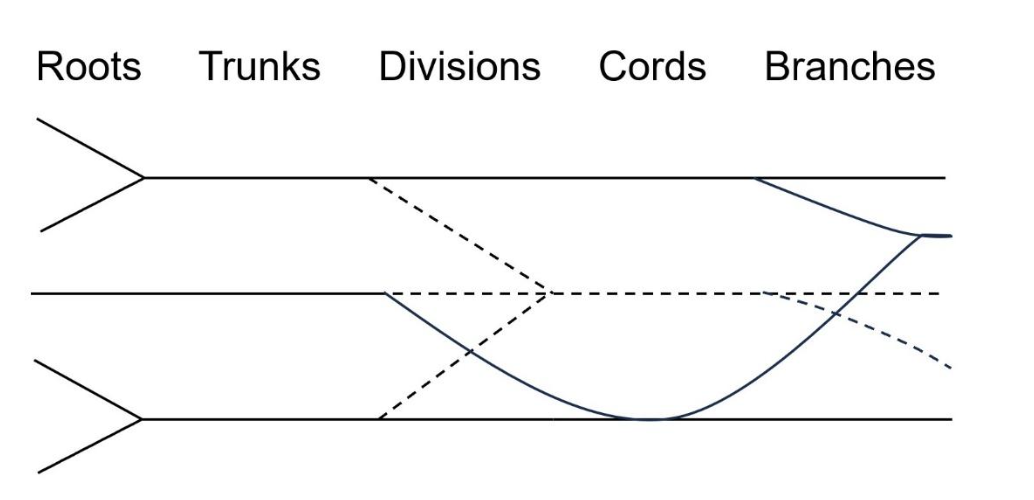
There are 5 Roots, corresponding to the parts of the nerves that extend from the spinal column – specifically, from the cervical vertebrae. Don’t let that C8 confuse you – remember, there are only 7 cervical vertebrae, but the cervical nerves start at the top of the 1st cervical vertebrae, so the cervical nerve at the bottom of the last cervical vertebrae is the 8th cervical nerve.

There are 3 Trunks – the superior, middle, and inferior trunk. Nice and straight-forward!
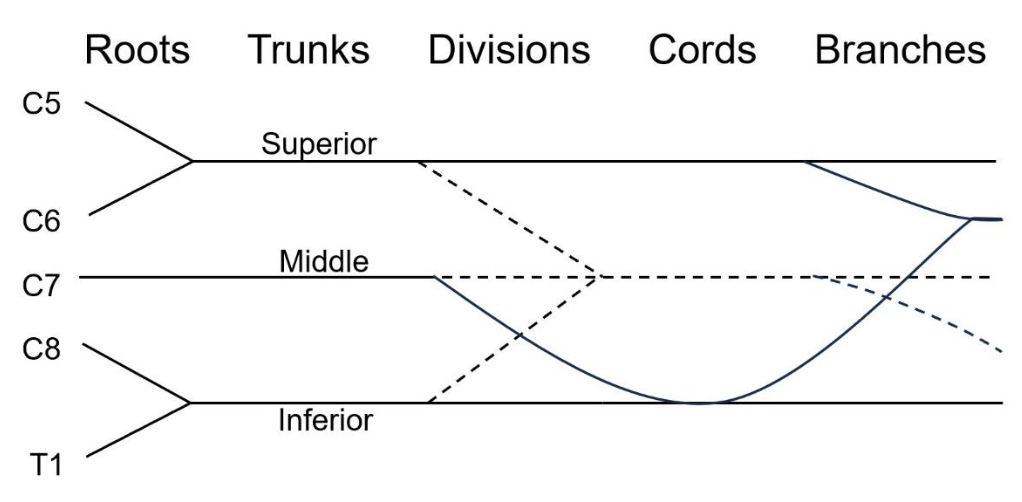
From this point forward, some lines are solid and some lines are dashed. The solid lines correspond with the parts of the nerves that are anterior, and the dashed lines correspond with the posterior parts of the nerves. There are 6 Divisions – 3 of these Divisions are anterior (represented by solid lines) and 3 of these Divisions are posterior (represented by dashed lines).
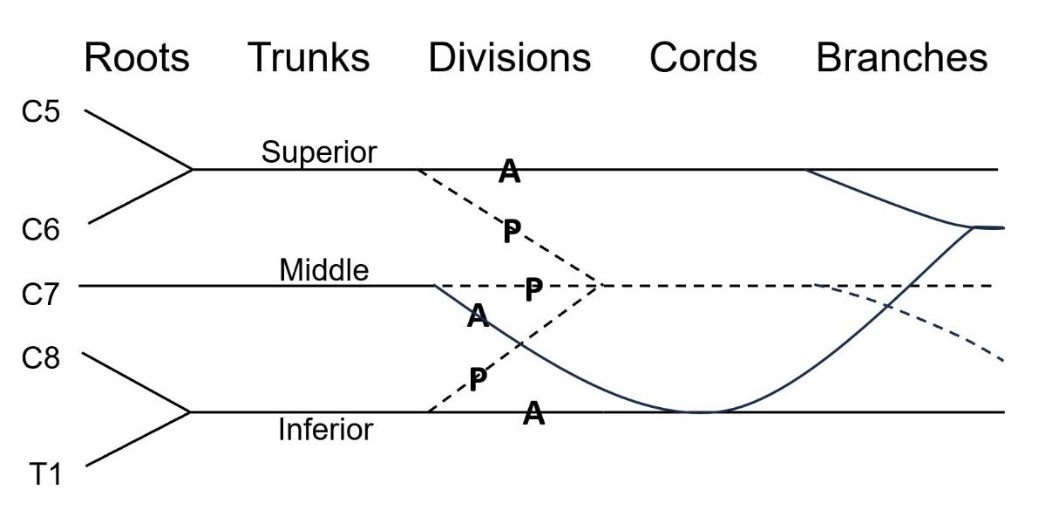
There are 3 Cords – the medial, posterior, and lateral cord. The cord in the middle is drawn with a dashed line, indicating that it’s located posteriorly. The two cords on the outside are located anteriorly.
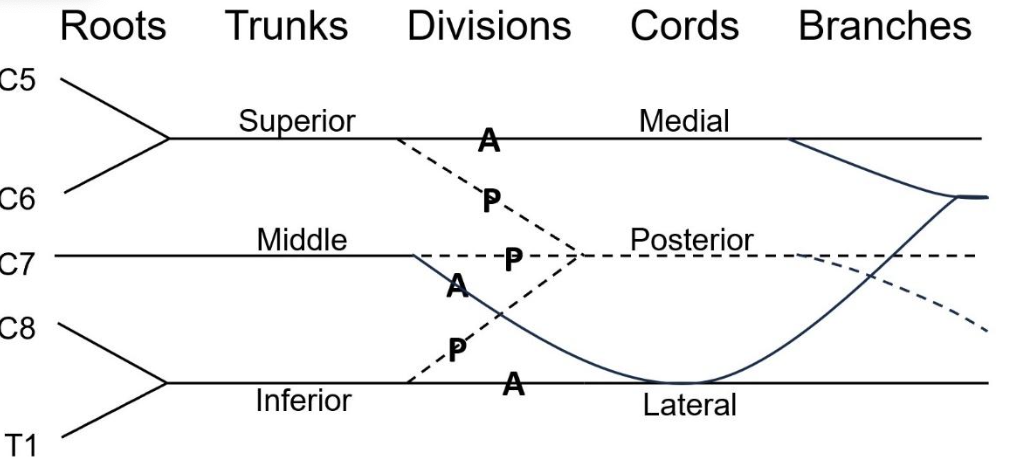 Finally, there are 5 Branches – the ulnar, median, radial, axillary, and the musculocutaneous branch. The branches drawn with solid lines are located anteriorly, and the branches drawn with dashed lines are located posteriorly.
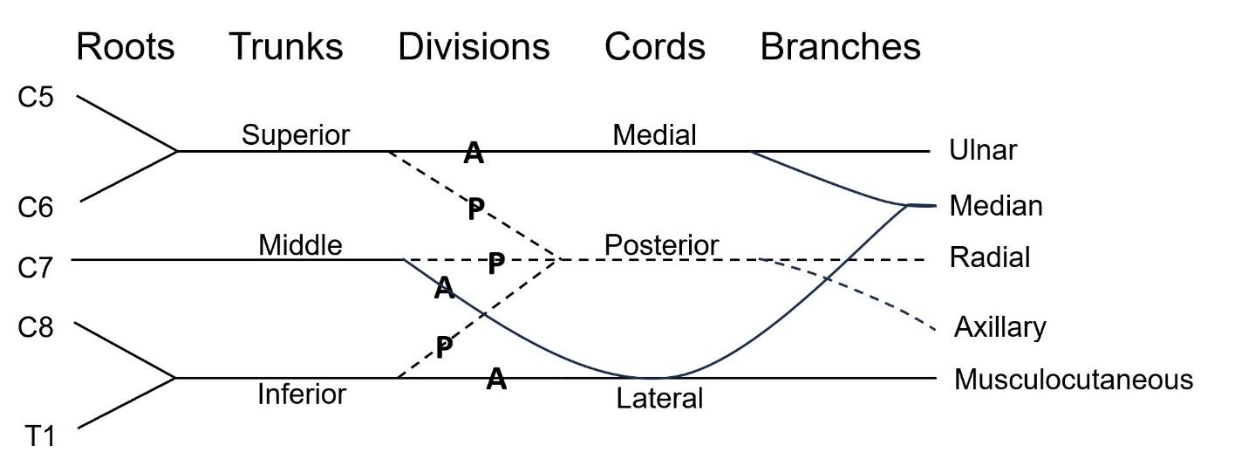
That’s it – you’ve drawn the brachial plexus! Nice work!
Practice Makes Progress
After admiring your handiwork, take some time to practice this drawing. Repetition helps our brain remember things, so drawing the brachial plexus multiple times will help you get this structure into your head. Then, test yourself! Try drawing the brachial plexus without looking at the reference drawing, and check it when you’re done. What was easier for you to remember, and what was more challenging? Keep practicing – once you can draw out this structure correctly without looking, you’re in good shape!


Comments