 Excel has been a through line of my academic and professional career. It is a skill that, once mastered, helped me in many spheres of my life. I've had to help a lot of people with varying levels of Excel proficiency. In this post, we’ll talk about how to autofill formulas in Excel. If you’d like to learn about additional strategies in Excel, you should read other posts in this series!
How do I take a formula that I just created and fill it to the last row of data?
You might come across a situation wherein you're working with a large data set and you need to add additional columns to your data set for further analysis. This additional column might be dependent on existing data points in the data set so this additional column might just be cell referencing the existing data points. The below is an example of this situation.

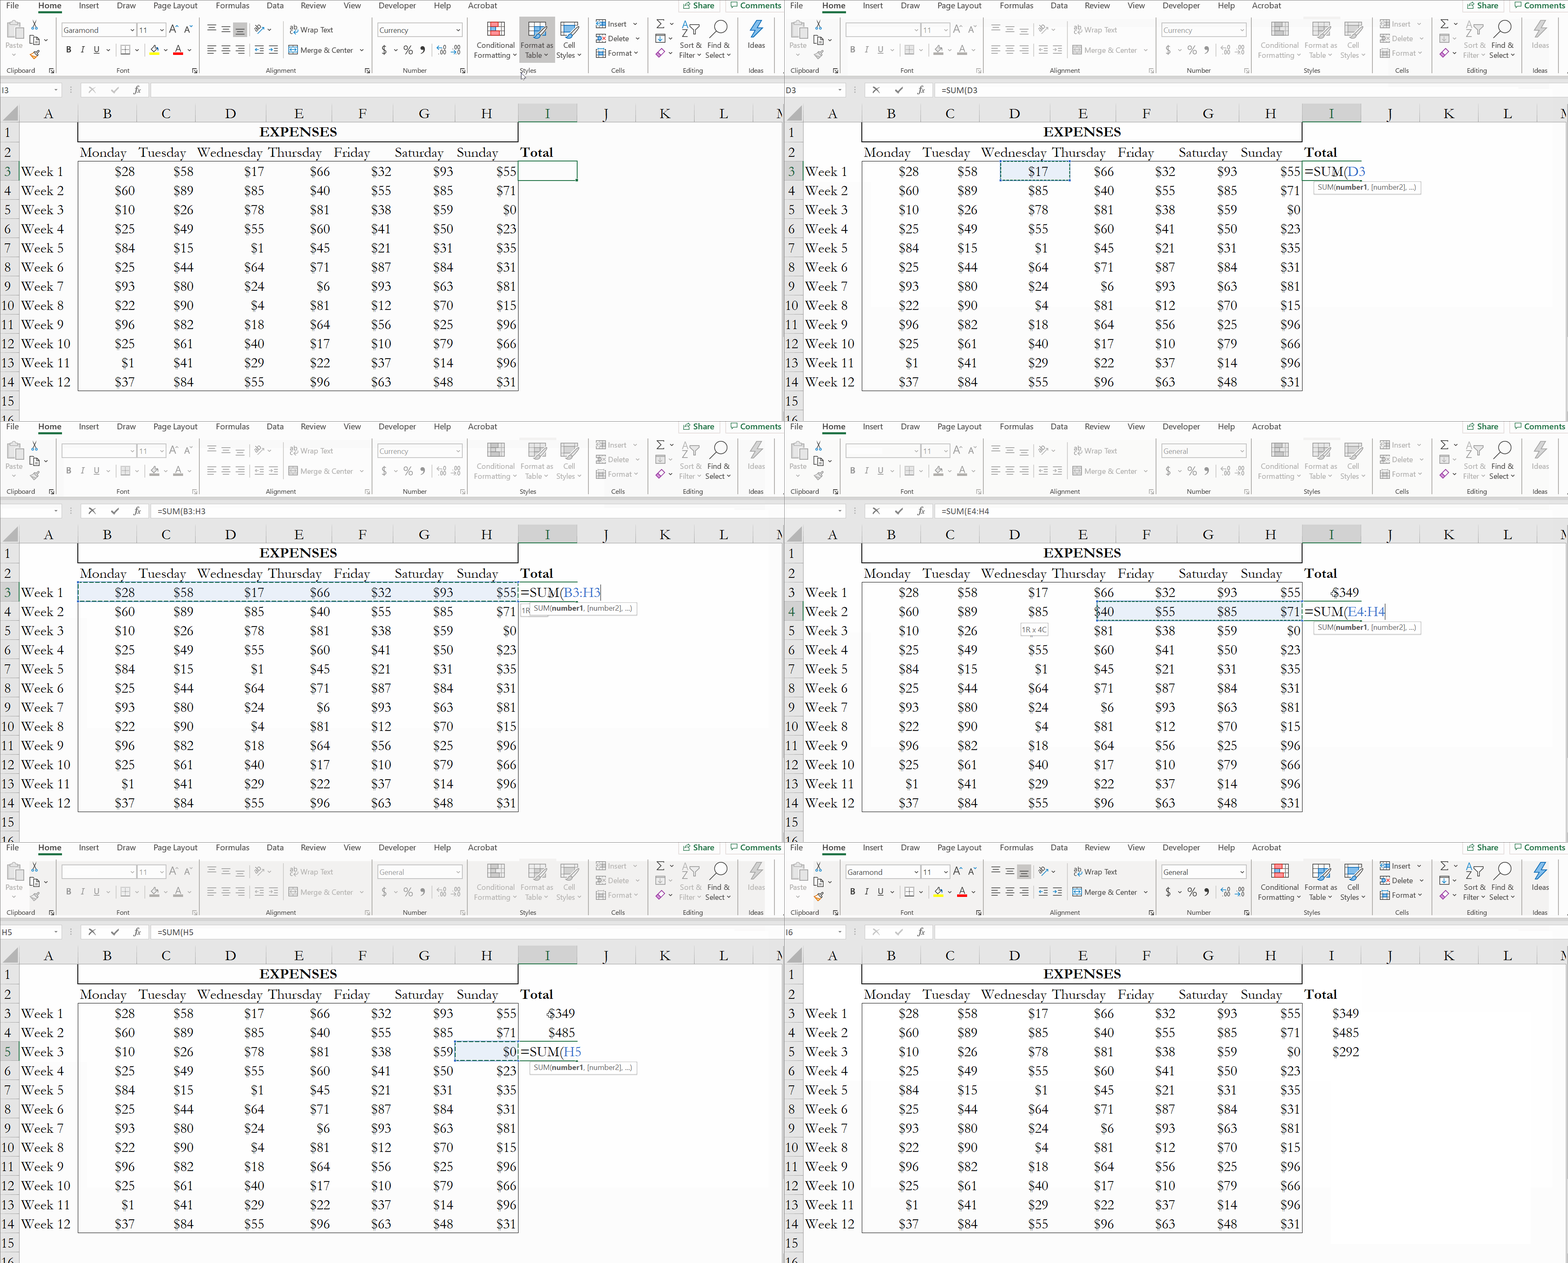
Let's talk about the structure of the data. Each row in this data represents a different week (in this example, there are 12 of them) and each column, starting in Column B and ending in Column H, represents a day of the week. To contextualize this example - let's say that this is a daily expense tracker. So, for example, cell B3 through cell H3 represent the expenses incurred during Week 1.
What we want to do is sum the daily expenses for each week so that we get a sense of what the weekly expenses are. To do this using an Excel function, use the =SUM formula. As we see in the example above, we type =SUM in cell I3 and then highlight the range of cells that we want summed (B3 to H3). The output of this function represents the sum of the daily expenditures in Week 1 (i.e. our weekly expenditure).
How do I apply the formula to each week without having to rewrite the =SUM formula for each row (i.e. each week in our dataset)? There are two ways to do this!
Method 1
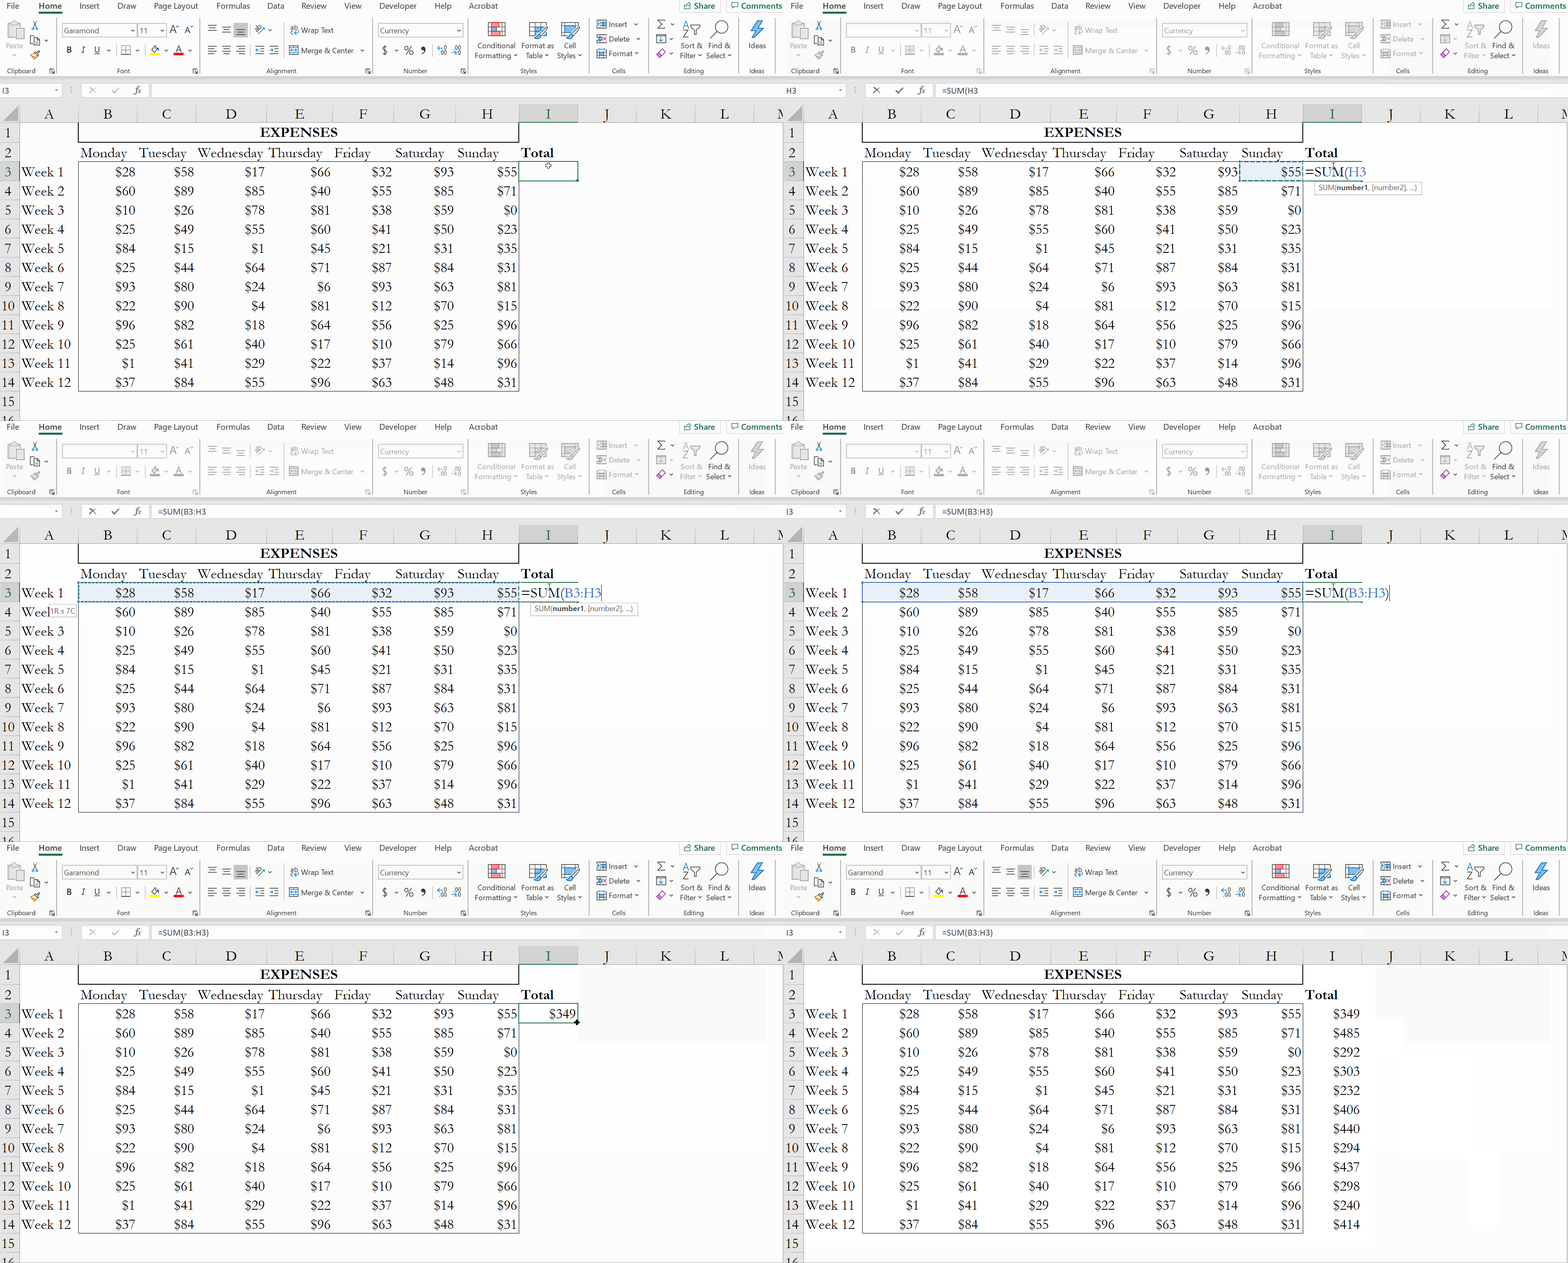
Click into the cell that contains the formula. You'll notice the lower right-hand corner of the cell has a small square - double click on this square. This will auto-fill the =SUM formula all the way to the bottom of your dataset. This method will always work provided that the column you added is directly to the right of another column in your dataset that is complete. In the example below, the formula in the added column auto filled to the very bottom because the column directly to the left of it (i.e. the 'Sunday' column) is filled all the way to the bottom of the dataset.

Method 2
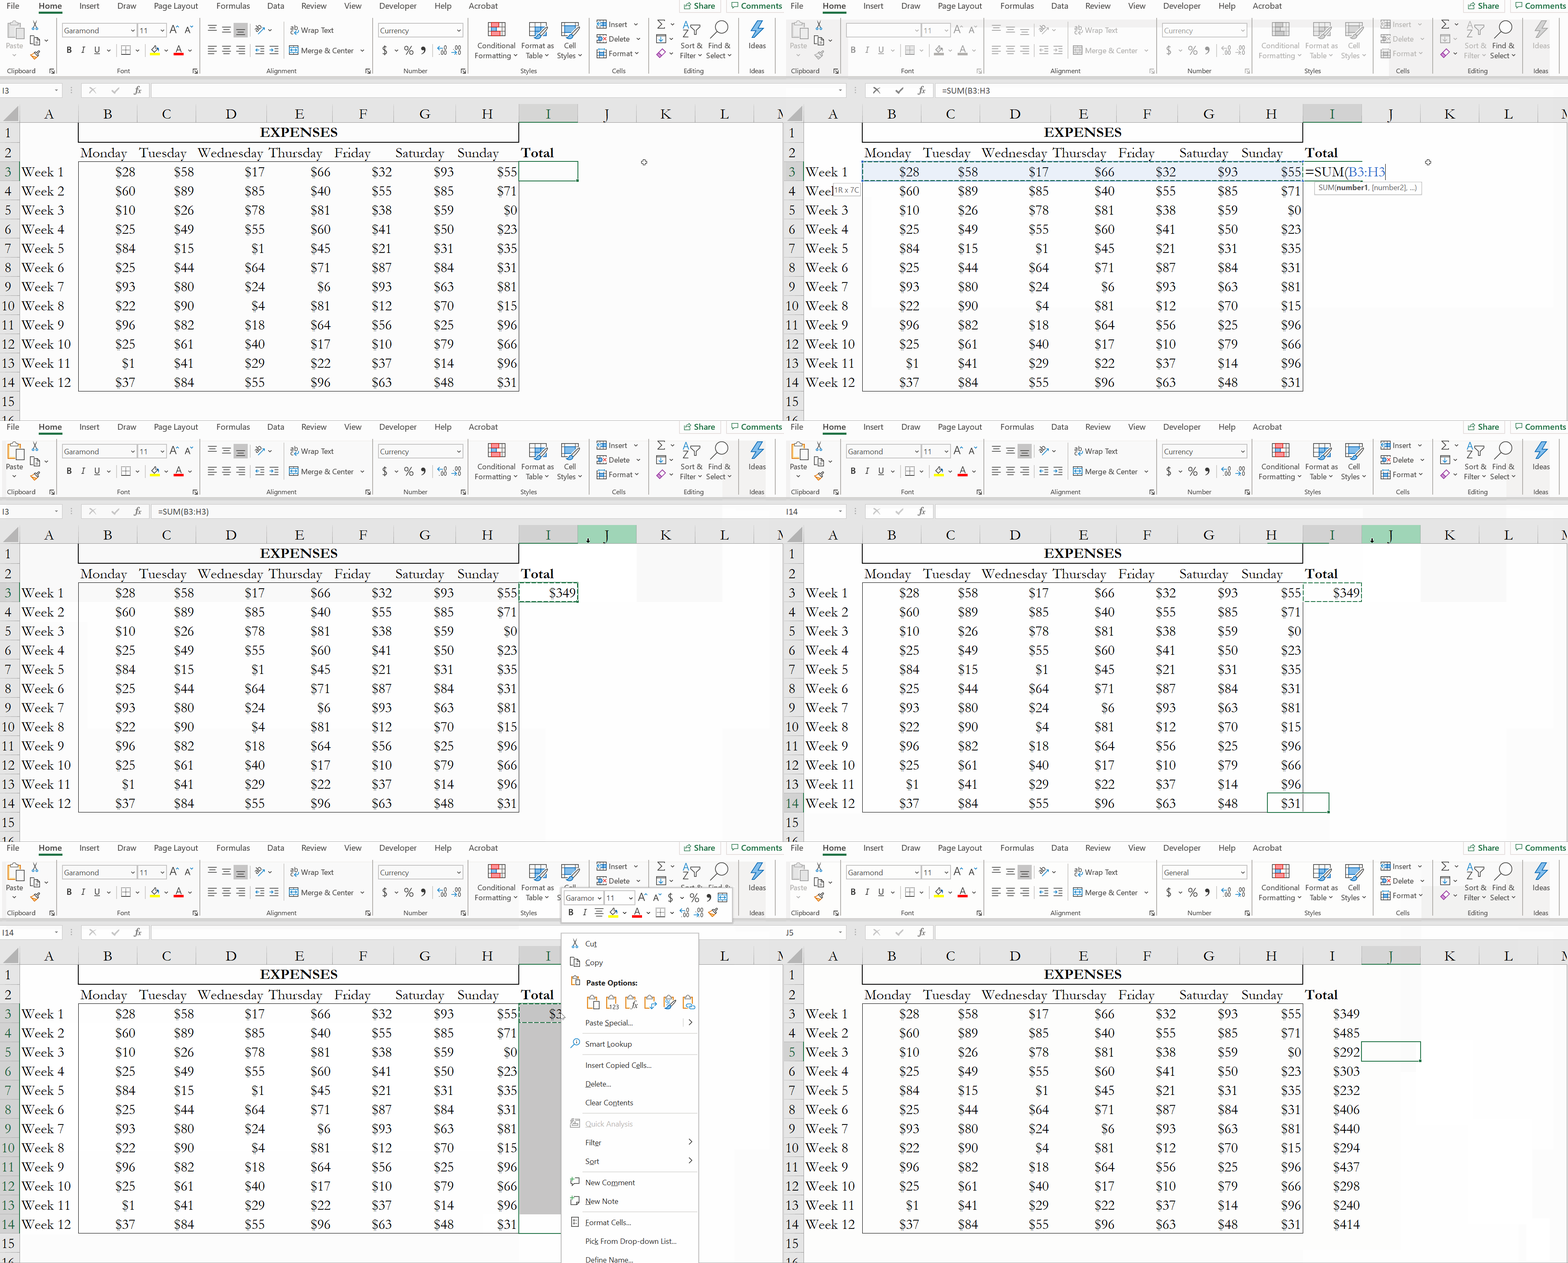
For those that don't want to use your mouse, you can use a combination of navigation shortcuts and keyboard shortcuts to copy the formula to the last row of the dataset. Copy the formula (CTRL + C) > Arrow over to a column that is fully complete > Go to the last row of that column (CTRL + Down Arrow) > Arrow over to the column that you want to fill in > While holding SHIFT + CTRL, press the Up Arrow > Paste the formula (CTRL + V).

Try either method (or both) the next time you run into this situation! Method 2 seems longer because of all the keystrokes, but as you build the muscle memory, it might even be a faster way to fill data than Method 1.
Enrique graduated with a BS in Finance and Statistics from New York University's Stern School of Business and earned his MBA from Columbia Business School, graduating with Dean's Honors with Distinction. Enrique has been running a data analytics consulting startup out of the Columbia Startup Lab Incubator since he completed his MBA.
Enrique has years of experience tutoring MBA students in various subjects including accounting, statistics, business, and Excel. He is a CFA Charterholder, so he is comfortable helping with anything finance-related as well. Witnessing his students achieve academic and professional success makes Enrique's role as a tutor extremely fulfilling.
Curious to learn more about business tutoring? Read some of our other blog posts below!
Solving tough algebra problems with Excel’s Goal Seek feature
4 Excel Quick Tips to Navigate Data Faster
Business School Admissions: You Got In! Now What?


Comments