Truss Analysis was the first engineering concept I learned at Cornell. It involves the Balance of Force and Moments, and can be quite confusing at first. I will break it down into a couple of steps that you can apply to every Truss you see!

STEP ONE: IDENTIFY AND SOLVE FOR THE EXTERIOR FORCES
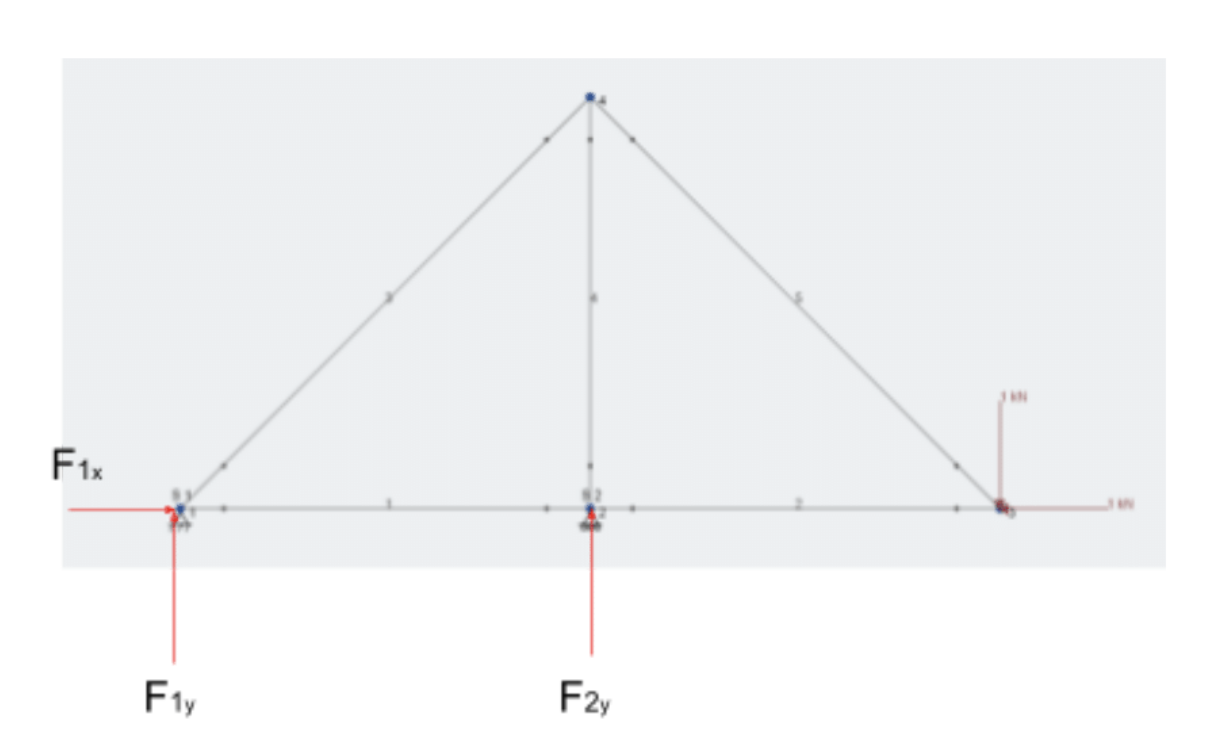
Identify any exterior supports and forces. There are two main types of supports: pinned supports and roller supports. Pinned supports give a reaction force in the x and y direction; therefore we will draw two arrows representing these reaction forces whenever we see a pinned support. Roller supports give a reaction force only in one direction. A horizontal roller support, which can move only in the horizontal direction, gives a reaction force in the y direction. Draw an arrow in the y direction to represent this force.
In the example shown above, there is a pinned support at point one, and a roller support at point two. Therefore, I draw in reaction forces as shown below.
Now, apply the balance of forces in the x and y direction. This means all the forces in the x direction will sum to zero, and all the forces in the y direction will sum to zero. Remember to take note if a force is applied in the negative or positive direction!
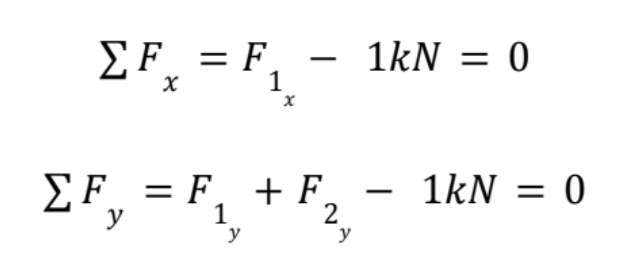
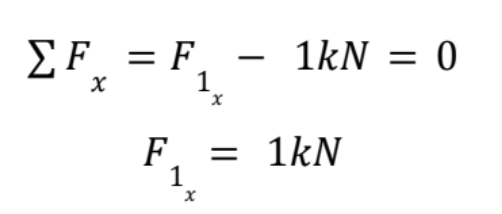
Now, look at these equations and see if you can solve for anything. I can see that I can easily solve for F1x because it is the only unknown in that equation.
Looking at the balance of forces in the y direction, I will need to use another equation because there are too many unknowns. This is when I will use the Balance of Moments.

Start by looking at the point with the most unknowns. In this case, I will look at point one. Remember you need a force, and a distance. This means that I do not consider any forces on point one. In our case, F2y is a force 1 meter away from point one. At point three, the only force we consider is the 1 kN in the -y direction. The force in the x direction will not be considered because it is applied in the same direction as our displacement, and will not cause a moment at point one.
Remember to use the Right Hand Rule when determining the direction of your moments!

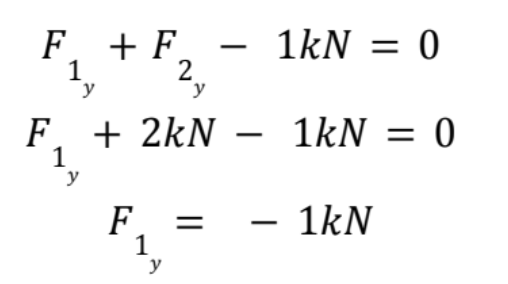
I can now solve for F2y:

Now my balance of forces in the y direction only has one unknown, and I can solve for F1y:
If you ever solve for a negative force, it just means the force is pointing in the opposite direction than how you drew it. If a question asks for you to solve for the reaction forces, you are all done!
STEP TWO: IDENTIFY EACH OF THE INTERIOR TRUSS MEMBERS
Now identify your interior truss members, and draw reaction forces in the x and y directions at each of their ends, just like I did below. Remember to add in any forces you have already solved for.
STEP THREE: SOLVE THE INTERIOR TRUSS MEMBERS ONE BY ONE
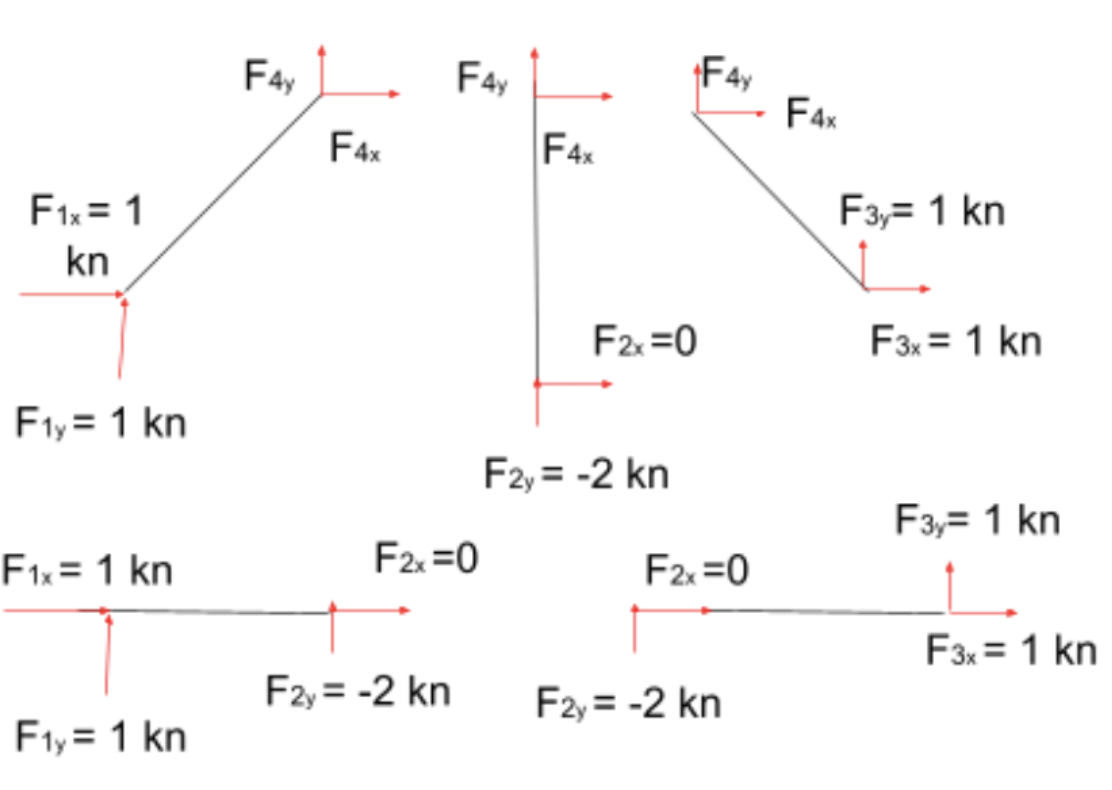
Now write out your balance of forces and balance of moments equations for each truss. For the truss between points 1 and 4, I would write out these equations.
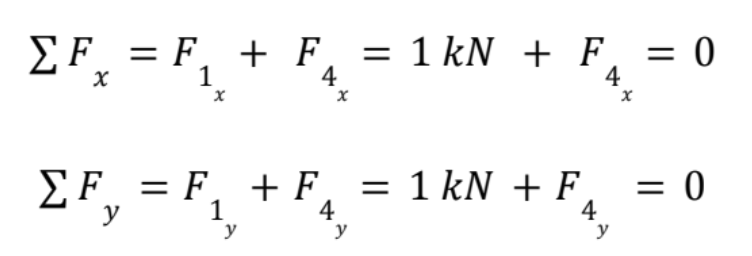
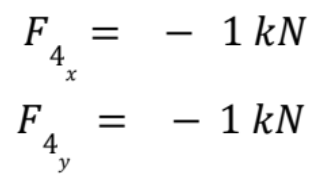
In this case, I can easily solve for each force using just the balance of forces.
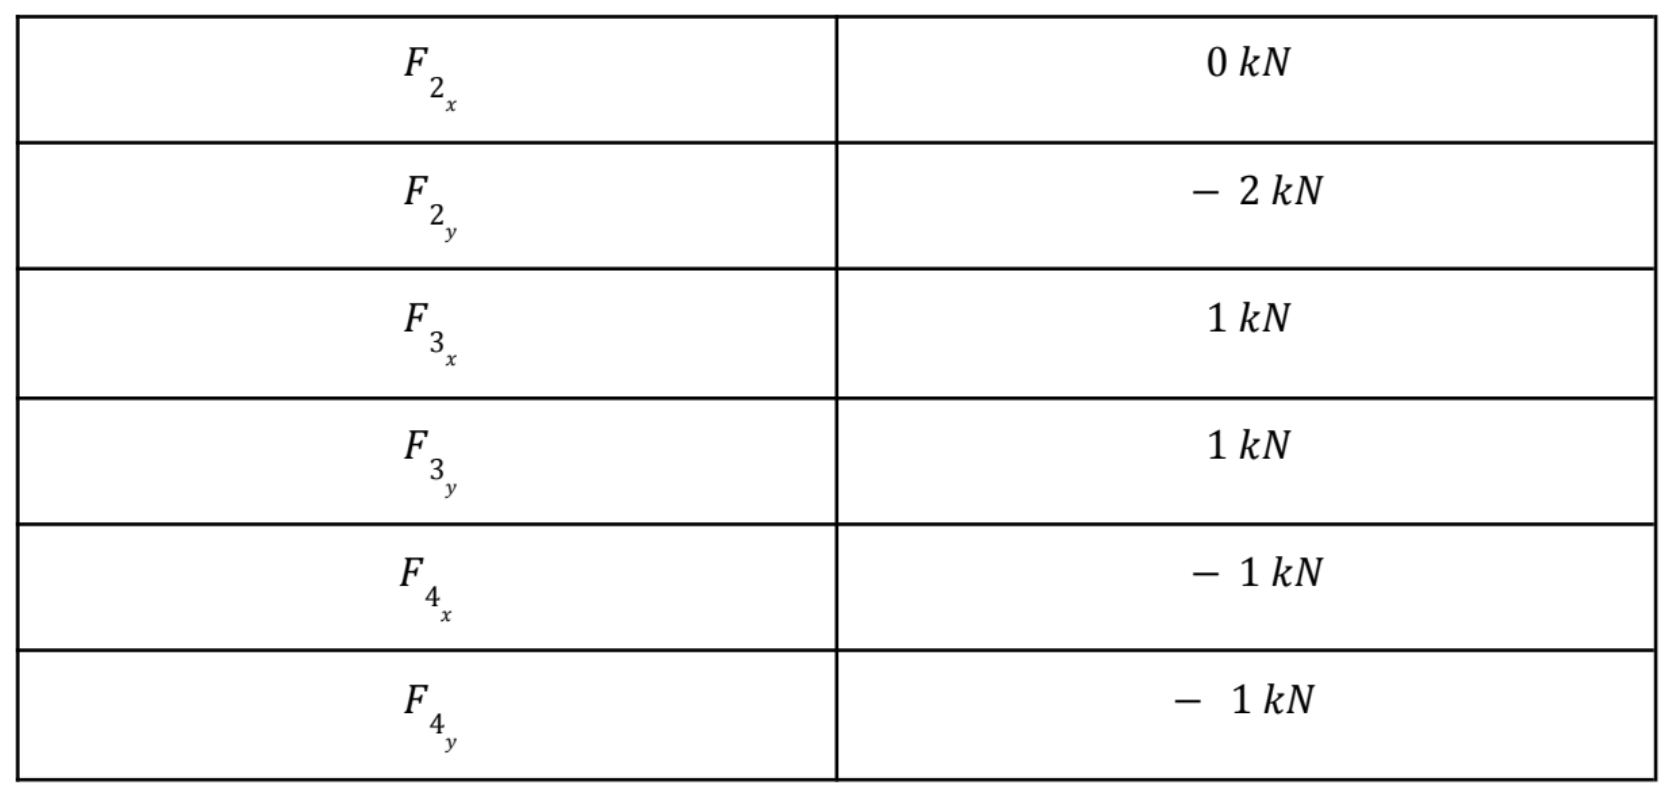
In other cases, you may need to use a balance of moments if there are too many unknowns with just the balance of forces. Continue going through each member, solve any equations with the least unknowns first. As you go through this process, create a table that shows all the forces you have solved for. This will help you stay organized, as the amount of unknowns in these problems can quickly become overwhelming.

If you have any additional questions, please leave a comment below. Hope this has helped the future bridge builders!


Comments